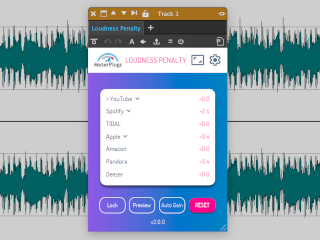
Will your music be turned down by online streaming services? That’s the question Loudness Penalty has answered since day one — and it’s still the question Loudness Penalty 2 answers. Insert the plugin on your master, press play, and see exactly how much each service will turn your track up or down.
What’s changed in version 2 is everything around that answer. We’ve kept the core as simple as it’s always been, but added a layer of detail and nuance for the moments when a single number isn’t the whole story. You can ignore all of it and use the plugin exactly as before. Or you can dig in when a track raises a question worth investigating.
Prefer to watch first? Mastering engineer Ian Shepherd walks through everything new in this video:
Here’s what’s new.
Block view: the whole loudness picture at a glance
The biggest addition is the block view. It packs a lot of information into an easy-to-read display:
- Max true peak — the top of the block
- Integrated loudness — the horizontal pink line through the block
- Loudness range (LRA) — the solid white section of the block
- Peak to loudness ratio (PLR) — the distance between the top of the block and the loudness line
- Clipping indicator - the solid red section at the top of the block
- Pink chevrons - the amount the track will be turned down (or up)
Together these tell you, at a glance, how loud your track is, how much its loudness varies, and how much headroom sits between your peaks and your average level. PLR in particular is a quick read on how much dynamic room your master has — a small PLR means a dense, heavily limited track; a larger one means more peak headroom.
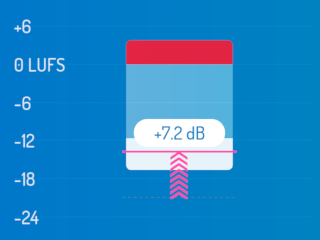
The block view: max true peak, integrated loudness, loudness range and PLR on a single display.
The block view really comes alive when you click a streaming service. The display shifts to show how that service’s normalization will reshape the block — where your loudness lands after the gain offset, and, crucially, whether your peaks will clip in the process. It’s one thing to read a penalty score; it’s another to see what that score does to your music’s loudness and headroom.
Hear Spotify’s Loud-mode limiter
Spotify’s “Loud” listening mode is the only streaming setting that applies a limiter rather than a simple gain change — and until now there was no way to know what it was doing to your music. Loudness Penalty 2 emulates that limiter directly in your DAW, with a real-time readout of the gain reduction it’s applying. You can preview the limited result, and solo the difference to hear exactly what’s being removed.
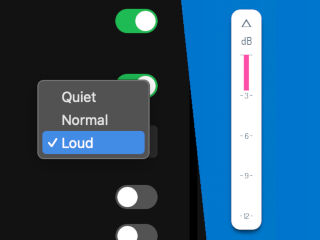
The gain reduction indicator shows, in real time, how much the Spotify Loud limiter is removing.
It’s a genuinely useful window into a part of the playback chain that’s normally invisible. That said, Loud mode is Premium-only and off by default, so we’d caution against making mastering decisions around it — it’s there for understanding, not for chasing.
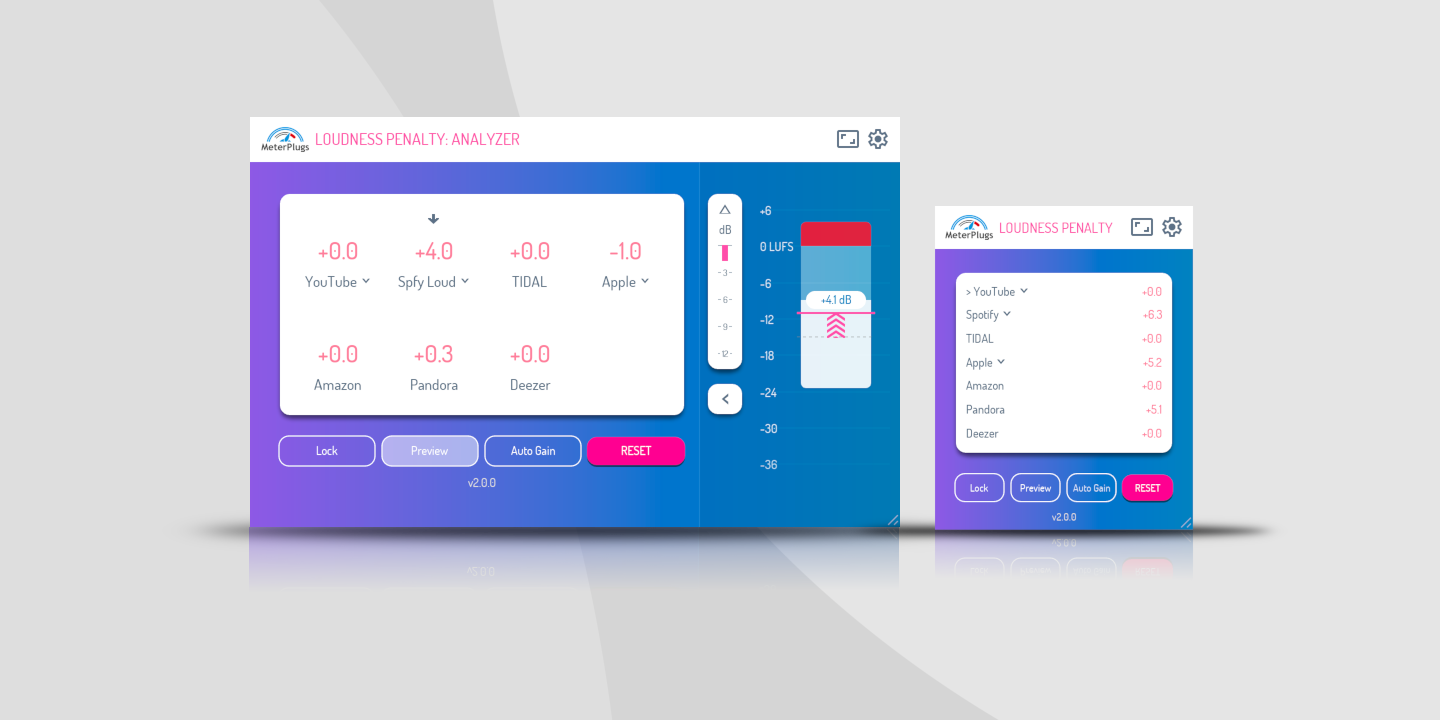
New scores: Spotify Quiet, Spotify Loud, and YouTube Music
Version 2 adds penalty scores for Spotify Quiet (-19 LUFS), Spotify Loud (-11 LUFS), and YouTube Music (-7 LUFS) — the highest distribution loudness of any service we model. Between these and the existing scores, you can now see how your track fares across every common listening configuration, not just the defaults.
Lock your measurements
The new lock button freezes every measurement — integrated loudness, max true peak, loudness range — so the penalty scores and the block view stop updating. This solves a real workflow annoyance: once you’ve measured a whole song end to end, you often want to preview specific sections without the numbers drifting as you scrub around. Lock the measurements, then audition freely.
A UI that fits your session
Loudness Penalty 2 is fully resizable — drag the corner, or pick from preset sizes. The most useful addition is a compact list view (“mini” mode) that trims the interface down to a single strip of the numbers you need. It’s small enough to sit beside a busy mastering session, but complete enough that you’re not giving anything up to keep it open.
Mini mode: a compact list view that fits beside a busy session.
A word about LUFS targets
With more numbers on screen, it’s worth repeating something we feel strongly about: there is no magic LUFS target.
The common advice to “master to -14 LUFS” treats a service’s distribution loudness as a goal to hit. In our experience that’s misguided. It doesn’t make sense for an acoustic ballad and a full-tilt rock song to sit at the same loudness — the differences between them are the point. Aiming for a number tends to flatten exactly the contrast that makes music feel like music.
Loudness Penalty 2 isn’t a target to chase. It’s a tool for understanding — for seeing and hearing how each service will treat your track, so you can make an informed decision. The plugin tells you what will happen. What to do about it is, and always should be, the engineer’s call.
Here are two situations where that distinction matters.
Example 1: a large negative penalty
Say your master shows a big negative score — it’s going to be turned down significantly on most services. That’s not a problem to fix so much as an opportunity worth exploring. Because the service is going to lower your overall level anyway, you’re not gaining loudness by pushing so hard — you’re only spending dynamic range to get there.
Try a more dynamic version. Pull the overall loudness down, and use the headroom you free up to let key sections — a chorus, a drop, a final climax — actually pop. The track may end up at the same playback loudness after normalization, but with more punch and contrast than the squashed version had. Use preview mode to compare the two at matched playback levels and decide which one you prefer. Often the more dynamic one wins.
Example 2: a very quiet track
Now the opposite. A very quiet track might not get turned up to meet the target — and that surprises people. YouTube and TIDAL don’t raise the level of quiet material at all, so a quiet master simply plays quiet there. Apple and Spotify (in Normal mode) will boost quiet songs, but only so far: they cap the increase to keep your max true peak from clipping. So a quiet track with peaks already close to 0 dBFS can be held back from reaching full playback loudness.
And in Spotify’s Loud mode, the limiter enters the picture — boosting a dynamic, quiet track toward -11 LUFS can drive its peaks into the limiter, reshaping it in ways the limiter preview will show you.
The block view makes all of this visible: you can see whether your peaks are leaving level on the table, and decide whether a touch more true-peak headroom management is worth it.
Available now
Loudness Penalty 2 is available in AAX, AU, and VST formats for macOS and Windows. It costs $49, and upgrades from version 1 are available. You can find full details on the product page, or try the free web tool for a quick check on a rendered file.
Loudness Penalty 2 gives you more to look at than ever before. But its job hasn’t changed: to show you what’s happening, and leave the creative decisions where they belong — with you.