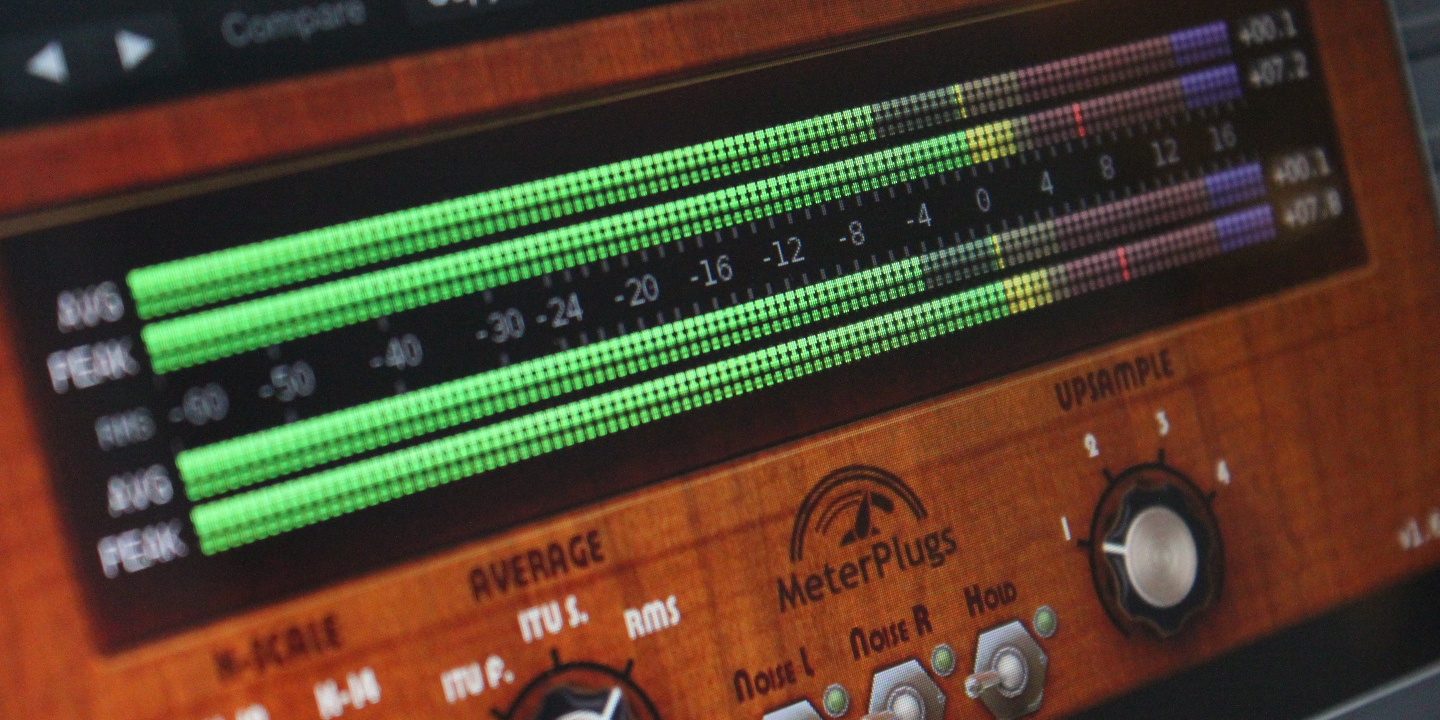
The K-System is a metering and monitoring system invented by Grammy Award-winning mastering engineer Bob Katz, in an attempt to curb the loudness war. It helps you answer the age-old question: “How loud should my mix / master be?” But is the K-System still relevant now that loudness meters are standardized and streaming services normalize everything they play? I think so. Let’s review the K-System to see what nuggets of wisdom we can find…
Nuts and Bolts
A K-System meter, like K-Meter, has a peak meter and an RMS meter for each stereo channel. An RMS meter measures “average” signal strength, similar to an analog VU meter, and can be used as a budget replacement for a loudness meter. A key idea of the K-System is that you should focus primarily on RMS levels, rather than peak levels, because RMS levels correspond more closely with how we perceive loudness. The peak meter is used primarily to detect clipping.
Both the peak and RMS meters in the K-System are linear rather than logarithmic. In a linear scale, each dB has the same width or height (depending on whether the scale is horizontal or vertical). With a logarithmic scale, dBs near the “top” of the scale are larger than those near the bottom. The non-linear sizing of a logarithmic scale might tempt you to “squash” your levels near the top of the scale, since that region appears larger than the rest of the scale. Using a linear scale helps to counteract that temptation.
“Integrated” Metering
The K-System is “integrated” in the sense that the metering is “linked” to the monitoring. In other words, levels on the RMS meters correspond to physical sound pressure levels. For this to work, your monitors must be calibrated with the RMS meters. This has a couple of advantages. First, by working in a calibrated environment, you can make more consistent decisions about your music’s levels. Second, the levels on the meter will reinforce what you hear and vice versa. Over time, this will “tune” your ears and improve your judgement.
Anchor Points
K-System meters differ from most other peak and RMS meters in that the 0 dB point is shifted “down” from the top of the scale. In other words, 0 dB does not correspond to 0 dBFS (the highest possible level before clipping). Instead, 0 dB corresponds to -12 dBFS, -14 dBFS or -20 dBFS (more on this later). These “anchor points” are meant to be the average levels of your music. This has a subtle implication: rather than focusing on the top of the scale (0 dBFS), which might tempt you to maximize your levels, you instead focus on an anchor point that represents the average level of your music.
K-Scales and Headroom
The K-System has three “K-Scales”: K-12, K-14 and K-20. These correspond to the anchor points mentioned previously: -12 dBFS, -14 dBFS and -20 dBFS. Each scale provides a different amount of headroom, the space above 0 dB. For example, K-20 has 20 dB of headroom while K-12 has 12 dB. The more headroom you have, the further your peak and RMS levels can go above the average level.
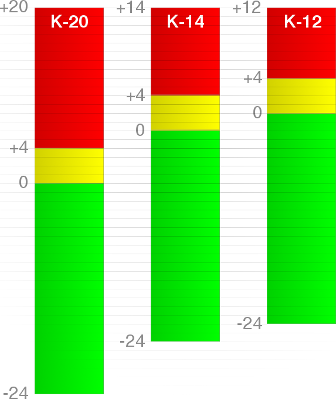
The K-System’s RMS meters have three, color-coded regions: green, yellow and red. Green corresponds to quiet, yellow to loud and red to very loud. The green and yellow regions border the 0 dB anchor point mentioned previously. Since 0 dB represents the average level of your music, you might go above 0 dB into the yellow or red during loud passages, or drop into the green during quiet passages.
K-20 vs K-14 vs K-12: Which Should You Use?
You choose a K-Scale based on how much dynamic range your material needs:
- K-20 suits material with wide dynamic range: classical, jazz, acoustic music and film.
- K-14 suits moderate dynamic range: most pop, rock, R&B and country.
- K-12 suits limited dynamic range and more heavily compressed material.
If you’re unsure, start with K-14 for music. The scale isn’t a rule about how loud your master must be. It’s a frame of reference: pick the one whose headroom matches the dynamics you want, and let the anchor point show you when your average level drifts.
Reference Level and Calibration
When your monitors are calibrated with the K-System meters, 0 dB on the meters should correspond to a real-world loudness of 83 dBSPL (85 dBSPL for two channels), a reference level that has been used in the film industry for years. This calibration must be done separately for each K-Scale, since the 0 dB anchor point will be -12 dBFS, -14 dBFS or -20 dBFS, depending on the K-Scale. The key thing to remember is: no matter which K-Scale you choose, 0 dB corresponds to the same physical loudness. The difference between the scales is the amount of headroom they provide.
To calibrate your monitors, choose a K-Scale and then play a single-channel, full-spectrum pink noise signal at 0 dB on that scale. K-Meter includes a pink noise generator for exactly this. From your listening position, use an SPL meter (with a C-weighted, slow response) to measure the loudness. Tweak your monitor gain until the SPL meter reads 83 dBSPL. Then, repeat the process for the other channel. Make a note of your calibrated monitor gain for future reference. Then, if desired, repeat this process for the other K-Scales.
The K-System, LUFS and Streaming
Since this post was first written, loudness metering has standardized on ITU BS.1770, which measures loudness in LUFS, and streaming services such as Spotify, YouTube and Apple Music now normalize playback to a loudness target. That changes the question from “how loud should I make it?” to “how will it sound after normalization?”
The K-System’s core ideas carry over well. Focusing on average level rather than peaks, working in a calibrated room, and choosing your headroom deliberately all lead to masters that hold up when a streaming service turns them down.
If you want both views in one place, K-Meter combines K-System metering with BS.1770 loudness and true-peak metering. To see how a specific master will be treated by each streaming service, Loudness Penalty shows the adjustment per platform.
K-System vs K-Weighting
The two names are easy to confuse, but they’re unrelated. The K-System is Bob Katz’s metering and monitoring approach described above. K-weighting is the frequency-weighting filter that ITU BS.1770 applies before measuring loudness in LUFS, so a loudness meter reflects how we hear different frequencies. If you arrived here looking for K-weighting, see Loudness Units 101.
Actionable Tips
Even if you decide not to use the K-System, here are some ideas that you can incorporate into your workflow:
- Focus primarily on an RMS meter, VU meter or loudness meter rather than a peak meter
- Be aware of the type of scale that your meter has - is it linear or logarithmic?
- A calibrated listening environment can help you “tune” your ears and make more consistent decisions
- Use an anchor point below 0 dBFS, so that you aren’t tempted to “squash” your audio